Showing posts with label by. Show all posts

Friday, 29 March 2013

GTA 4 Grand Theft Auto IV - Complete (2010/PC/ENG/RePack By Hey Buddy)

GTA 4 Grand Theft Auto IV - Complete (2010/PC/ENG/RePack By Hey Buddy)
English | Platform: PC | Release: 2010 | Publisher: Rockstar Games | Developer: Rockstar North | 12.69 GB
Genre: Action

In the В«Grand Theft Auto IV. The full edition "includes action Grand Theft Auto IV, as well as the addition Grand Theft Auto: Episodes From Liberty City, consisting of episodes of The Lost and Damned and The Ballad of Gay Tony, the story lines that complement each other and reveal completely the opposite faces of the criminal world. In the Russian edition of these games are presented in the original sound system with Russian subtitles. Niko Bellic, Johnny Klebitts and Luis Lopez live in the worst city in America - Liberty City. It is a paradise for those in power with a stuffed wallet and a nightmare for those who are deprived of these benefits. Nico desperate to find his place in the "city of infinite possibilities." Johnny biker gang from "Lost" is trying to survive the brutal feuds between street gangs. Louis, the right-hand man and bodyguard nightclub owner Tony Prince, nicknamed Blue, Tony, is torn between family and friends, trying not to lose the confidence of those, or others, which is extremely difficult in a world where everyone has a price. In general, these guys are trying to survive in a city of violence and corruption. Sooner or later, their paths cross, and the consequences will be catastrophic.

Features:

Just as in life! Series has matured. More serious and thorough approach is visible throughout. For example, to steal a car, you must first break the glass and break the locks, firing even one police officer can lead to death. Used in the game, new graphics technologies provide even greater realism.
Welcome to New York! Liberty City - a copy of the largest U.S. cities. Only some names and places have been changed to comply with political correctness.
A city without limits. Liberty City is truly enormous. To get from one of its suburbs to the other, need an hour of real time. Players can not only admire the dozens of skyscrapers, but also to go inside many buildings, use public transport - such freedom of movement in the GTA was not yet!
Plexus fate. Stories Niko Bellic from the original game, as well as Johnny Klebittsa and Luis Lopez, will appear in new episodes, unique and at the same time connected with each other. Just before the end of his way each character, you can get a complete picture of criminal intrigues, enveloped in Liberty City.
Maximum potential. in В«Grand Theft Auto IV: Complete Edition" is a full arsenal of weapons, as well as the entire fleet of the fourth part of the famous series, which includes motorcycles, luxury cars, helicopter gunships and even armored vehicles. Who is stronger, he is right. The Lost and Damned and The Ballad of Gay Tony added in GTA IV new types of multiplayer games.

Features RePack:

* Do not cut
* Television is compressed by 50% / 20fps
* Version GTA4: 1060 (EFIGS) / 1051 (RU) / 1004
* Version EFLC: 1110 (EFIGS) / 1101 (RU)
* Installation time GTA4: 1:00
* Installation time EFLC: 1.5 hour (if GTA4 - 1:00)
*  Repack by z10yded
By my measurements, to free from extraneous requests disk

Installation Info:
Burn Dvd By Your Favorite BurnIng Software Or Unmount By Demone or Power ISO
Run Setup.exe
When Demands 2nd Disk ... Unmount Again Or Insert Dvd 2
Again Same do in 3rd Disk
Play The Game
Enjoy

System requirements: 

V System: Windows XP / Vista / Windows 7
v Processor: Intel Core 2 Duo 1,8 GHz / AMD Athlon X2 64 2.4 GHz
v RAM: 2 GB (Windows XP) 2.5 GB (Windows Vista / 7 )
V Video Card: 512MB NVIDIA 8600 / 512MB ATI 3870
v Sound Card: Sound device compatible with DirectX 9.0
v Hard disk: 32 GB

Screenshots


Download :
Read more ...

Monday, 21 January 2013

Windows 8 Activator v4.1.0.0 By Blakeymort (Reuploaded)


- original type Offline Activation : This activation will allow you to work with your team as if legally activated ubieras permanent, even you used to upgrade from Pro to Pro with Media Center if you have a serial upgrade, you will not have to activate Windows now notification or watermarks.
- Enabling Offline generic: you generically windows active permanent lets you work all the functions of your Windows, sometimes you a notification to activate windows by the activity center which can disable the one time and will not have appear .

- Working for future versions:
Implement Offline Activation original type for versions currently working activation generica

4.0.1.6 4.0.1.5 same characteristics of
Add KMS servers by users
Activation Secondary eliminated by incompatibility and incorrect functioning in most computers. Total Cleaning: Allows thoroughly clean and remove all kinds of patches (The only thing that is not deactivated KMS)
Languages: Spanish - English

Windows 8 Activator v4.1.0.0
To close New Year with a bang, here are the Trigger Link 4.1

Online mode for this version:
Windows 8 Pro
Windows 8 Enterprise
Office 2013 VL 32 and 64 bit

The other versions of Windows 8 and Server 2012 can be activated using Offline activator, yet for next versions will review and modifies other versions to activate online mode.

Download :
Windows 8 Activator v4.1.0.0
Read more ...

Thursday, 10 January 2013

FIFA Manager 13 v1.02 (EnG/MulTi2) Repack by R.G. Catalyst


Release Date: 2012
Languages: English | Russian

The next game in the popular series of football management simulator «FIFA Manager», where you will find a host of new features and improvements. As in previous games, you will take control of football clubs and will practice all the basic aspects of its activities. Will train the players to engage in transfer policy, the development of the club's infrastructure, a healthy atmosphere in the team and many others. It is worth noting that in the FIFA Manager 13 is much more attention paid to the psyche of players, their motivations, the main objectives aimed at by the players, and the relationship with other players.

Features RePack
  • Do not recoded / no cut
  • Used crack from FIFAM.RU (version 0.2), the Russian editor of FIFAM.RU, Russian commentators on FIFAM.RU
  • Installation time ~ 10 min.
  • release R.G. Catalyst
Distribution of updated 28.12.2012. Updated the game to version 1.02 to version 0.2 crack, added Russian commentators. You can pereheshirovat old hand and spool the modified files.

Screenshot


Minimum System Requirements
  • OS: Windows XP/Vista/7
  • Processor: Intel Pentium 4 @ 2.4 GHz / AMD Athlon XP 2500+
  • Memory: 1 Gb
  • Hard Drive: 8 Gb free
  • Video Memory: 128 Mb
  • Video Card: nVidia GeForce FX 5600 / ATI Radeon 9600
  • Sound Card: DirectX Compatible
  • DirectX: 9.0c
  • Keyboard
  • Mouse
  • DVD Rom Drive

Recommended System Requirements
  • OS: Windows XP/Vista/7
  • Processor: Intel Pentium 4 @ 3.0 GHz / AMD Athlon 64 3200+
  • Memory: 1.5 Gb
  • Hard Drive: 8 Gb free
  • Video Memory: 512 Mb
  • Video Card: nVidia GeForce 8800 / ATI Radeon HD 3870
  • Sound Card: DirectX Compatible
  • DirectX: 9.0c
  • Keyboard
  • Mouse
  • DVD Rom Drive
Installation 
1. Unrar
2. Install the game
3. PLay

Info
1. Links download Interchangeable
2. Total part: 11 / 350 MB
3. Total file  : 3.59 GB

Rar password: koskomputer.blogspot.com

Download :
FIFA Manager 13 v1.02 (EnG/MulTi2) Repack by R.G. Catalyst
Read more ...

Friday, 9 November 2012

Make Your Drive Virtually Unhackable by Enabling TPM On Your Machine.


Hi all users, as we all know how easy it is for snoopers to get their hands on private and confidential data. That’s the main reason we need to constantly refine our security policies to keep confidential data safe. While there are many software applications that will do the job they could be easy to crack; at least for a seasoned hacker. That’s not the only reason to be worried. Imagine losing your laptop or even your portable drive which contains important data.

What we are referring to is hardware based encryption rather than the more common software based methods. To begin with you will need a PC with a motherboard that has an embedded TPM (Trusted Platform Module) chip. So before we even get into the intricacies of setting up the encryption system, let’s go a little further and understand the basic functionality of a TPM based motherboard.

In very simple terms, a TPM chip basically generates random encryption keys where half of the key is stored within the chip and is encrypted/decrypted using an incredibly strong 2048-bit RSA algorithm. This essentially makes it impossible to recover data from the encrypted drive, making it unique to the machine that was used for encryption. In other words, the contents of a protected drive are unreadable when connected to another machine or read by any unauthorized person.

Before we start, make sure that your motherboard or laptop has the Trusted Platform Module chip. Refer to the manual to confirm this. If it does you will need to make sure it is enabled in the BIOS. Before we progress further make doubly sure that you have not already encrypted any files using this method. If the user information is ever cleared, encrypted files will become inaccessible. Please do back up any protected files first! We also suggest backing up important data before proceeding.

Start your machine and press the [Delete] key to get access to the BIOS. For laptops it should either be the [F12] or the [F8] key. Search for the term “Security Chip Configuration” or a similar title and press [Enter]. Now select “Enabled” for the Security Chip and move to “Clear Security Chip”. Once the user information has been cleared save changes to the BIOS by pressing [F10], and restart.

Once you have logged into Windows install the TPM driver (check your motherboard CD/DVD) and restart again. This workshop uses a Gigabyte board that had an Infineon TPM chip. If you have a different chip note that the steps will be a little different, so excercise caution and check all options first.

Activating the TPM chip

Step 1: Bring up the “Infineon Platform Security wizard” by double clicking on the TPM icon. Click “Next” and select “Security Platform Initialization”. On proceeding you will need to feed in a password to initialize the process. Consider this to be your master password as you will need it whenever you want to make global changes.

Step 2: The Features menu allows you to choose three basic options such as “Automatic Backups”, “Password reset” and “BitLocker Drive Encryption”. We suggest you use the “Automatic backup” and “Password reset” features. Click on “Next” and choose your backup location. You can also reschedule your backup if the default time is not convenient. Clicking on Next will take you to the “Password Reset” menu. Make sure “Create a new Token” is selected and choose a file location. Here it is advisable to save the token to a portable drive rather than the hard drive. Enter the password and click on “Next”. The wizard should now be ready to start initializing the TPM chip. Run an automatic backup once the wizard has initialized the chip.

User Initialization Wizard

Step 3: Double clicking the TPM icon will now bring up the User Initialization Wizard; choose “Next”. You will be asked to feed in your “Basic User Key”. This allows you to make user specific changes. On proceeding you will again be asked to create a Basic User Password reset key. We again recommend saving it to a pen drive. Confirm the setting and click on Next to initialize the setting for the user.

Step 4: The next couple of steps will allow you to enable and disable features such as “Encrypting File System” and “Personal Secure Drive”. On the Security Platform Features menu uncheck the “Secure e-mail” while keeping EFS and PSD checked before proceeding.

Step 5: To create an encryption certificate click on “Select” and choose “Create”. Select the created certificate and hit “Select”. You should now be able to view the certificate that was chosen. The next step allows you to create your own secure hidden drive.

Step 6: Map your drive to any one of the alphabets in the dropdown menu and give your new hidden drive a name. Leave the “Load my Personal Secure Drive at logon” option unchecked and click on “Next”. Decide on the amount of storage space that you want to assign to the secure drive. Now choose an existing drive where this virtual drive will actually reside. Make sure that the drive that’s chosen has enough free space to allocate. Click on Next and enter your basic user password following which the wizard starts configuring the features selected. Click Finish and you are all set to secure your files and folders.

You can load and unload your protected drive by simply right clicking on the TPM icon and navigating to “Personal Secure Drive | Load/Unload”. You can choose to either copy or send files and folders to your secure drive by simply right clicking and selecting the appropriate option.

Bitlocker Drive Encryption

For people who don’t own a TPM based motherboard or laptop there is yet another way of securing your valuable data. Windows itself comes with a utility known as BitLocker Drive Encryption. This feature can only be found in the Ultimate and Enterprise versions of Windows Vista, Windows 7 and Windows Server 2008 (Windows 7 comes with Bitlocker To Go for portable drives as well). This feature was designed to make use of a Trusted Platform Module (TPM) chip, but there is a way to work around this if you don't have one.

Follow the instructions carefully and back up your system before proceeding. Keep in mind that the Bitlocker Drive Encryption is designed to encrypt an entire partition or volume. Also the time taken to encrypt the entire drive depends on the overall size.

Step 1:
Open the start menu and type “Group Policy” in the search box. Now in the Local Computer Policy window navigate to “Computer Configuration | Administrative Templates | Windows Components | BitLocker Drive Encryption | Operating System Drives”. Right click on “Require additional authentication at startup” and click “Edit”.

Step 2: On the opened page select “Enabled” under “Require additional authentication at startup” and under options check “Allow BitLocker without a compatible TPM”. Once checked other options will automatically change; ignore the automated changes. After you have enabled it to start without a compatible TPM chip, click on Apply and exit the Group Policy editor. The above process basically enables BitLocker but without its full range of effectiveness.

Step 3: To enable BitLocker you will need to search for a file named “BitLocker”. Open the Windows Vista or Windows 7 start menu and type “BitLocker” in the search bar. Run the program “BitLocker Drive Encryption”. You should now be able to view all drives currently connected to your system. Select the drive that you want to encrypt and click “Turn on BitLocker”.

Step 4: Now select “Use a password to unlock the device” and type in your password. Further on you will be asked to “Save the recovery key to a file”. Save the file either to the hard disk or a portable pen drive to proceed. The recovery key is now your only option to able to access your device in case you forget the password. Once you are done click “Start Encrypting”.

Note :- Do not save your recovery key on the same drive that is being encrypted else you will not be able to unlock the device in case you forget the password!

Enjoy.......
Read more ...

Monday, 22 October 2012

HOW TO HACK SOMEONE BY KNOWING HIS IP


 Introduction
1. Welcome to the basic NETBIOS document created by aCId_rAIn. This document will teach you some simple things about NETBIOS, what it does, how to use it, how to hack with it, and some other simple DOS commands that will be useful to you in the future. THIS DOCUMENT IS FOR NEWBIEZ ONLY!!! If you are NOT a newbie then don't go any farther reading this because if you're smart enough you probably already know it all. So don't waste yourt time reading something that you already know.

1. Hardware and Firmware

1. The BIOS
The BIOS, short for Basic Input/Output Services, is the control program of the PC. It is responsible for starting up your computer, transferring control of the system to your operating system, and for handling other low-level functions, such as disk access.
NOTE that the BIOS is not a software program, insofar as it is not purged from memory when you turn off the computer. It's
firmware, which is basically software on a chip. 
A convenient little feature that most BIOS manufacturers include is a startup password. This prevents access to the system until you enter the correct password.
If you can get access to the system after the password has been entered, then there are numerous software-based BIOS password extractors available from your local H/P/A/V site. 
NETBIOS/NBTSTAT - What does it do?
2.  NET BIOS, also known as NBTSTAT is a program run on the Windows system and is used for identifying a remote network or computer for file sharing enabled. We can expoit systems using this method. It may be old but on home pc's sometimes it still works great. You can use it on your friend at home or something. I don't care what you do, but remember, that you are reading this document because you want to learn. So I am going to teach you. Ok. So, you ask, "How do i get to NBTSTAT?" Well, there are two ways, but one's faster.
Method 1:Start>Programs>MSDOS PROMPT>Type NBTSTAT
Method 2:Start>Run>Type Command>Type NBTSTAT
(Note: Please, help your poor soul if that isn't like feeding you with a baby spoon.)
Ok! Now since you're in the DOS command under NBTSTAT, you're probably wondering what all that crap is that's on your screen. These are the commands you may use. I'm only going to give you what you need to know since you are striving to be l33t. Your screen should look like the following:
NBTSTAT [ [-a RemoteName] [-A IP address] [-c] [-n]
[-r] [-R] [-RR] [-s] [-S] [interval] ]
-a (adapter status) Lists the remote machine's name table given its name
-A (Adapter status) Lists the remote machine's name table given its IP address.
-c (cache) Lists NBT's cache of remote [machine] names and their IP addresses
-n (names) Lists local NetBIOS names.
-r (resolved) Lists names resolved by broadcast and via WINS
-R (Reload) Purges and reloads the remote cache name table
-S (Sessions) Lists sessions table with the destination IP addresses
-s (sessions) Lists sessions table converting destination IP addresses to computer NETBIOS names.
-RR (ReleaseRefresh) Sends Name Release packets to WINS and then, starts Refresh
RemoteName Remote host machine name.
IP address Dotted decimal representation of the IP address.
interval Redisplays selected statistics, pausing interval seconds between each display. Press Ctrl+C to stop redisplaying
statistics.
C:\WINDOWS\DESKTOP>
The only two commands that are going to be used and here they are:
-a (adapter status) Lists the remote machine's name table given its name
-A (Adapter status) Lists the remote machine's name table given its IP address.
Host Names
3. Now, the -a means that you will type in the HOST NAME of the person's computer that you are trying to access. Just in case you don't have any idea what a Host Name looks like here's an example.
123-fgh-ppp.internet.com
there are many variations of these adresses. For each different address you see there is a new ISP assigned to that computer. look at the difference.
abc-123.internet.com
ghj-789.newnet.com
these are differnet host names as you can see, and, by identifying the last couple words you will be able to tell that these are two computers on two different ISPs. Now, here are two host names on the same ISP but a different located server.
123-fgh-ppp.internet.com
567-cde-ppp.internet.com
IP Addresses
4. You can resolce these host names if you want to the IP address (Internet Protocol)
IP addresses range in different numbers. An IP looks like this:
201.123.101.123
Most times you can tell if a computer is running on a cable connection because of the IP address's numbers. On faster connections, usually the first two numbers are low. here's a cable connection IP.
24.18.18.10
on dialup connections IP's are higher, like this:
208.148.255.255
notice the 208 is higher than the 24 which is the cable connection.
REMEMBER THOUGH, NOT ALL IP ADDRESSES WILL BE LIKE THIS.
Some companies make IP addresses like this to fool the hacker into believing it's a dialup, as a hacker would expect something big, like a T3 or an OC-18. Anyway This gives you an idea on IP addresses which you will be using on the nbtstat command.
Getting The IP Through DC (Direct Connection)
5. First. You're going to need to find his IP or host name. Either will work. If you are on mIRC You can get it by typing /whois (nick) ...where (nick) is the persons nickname without parenthesis. you will either get a host name or an IP. copy it down. If you do not get it or you are not using mIRC then you must direct connect to their computer or you may use a sniffer to figure out his IP or host name. It's actually better to do it without the sniffer because most sniffers do not work now-a-days. So you want to establish a direct connection to their computer. OK, what is a direct connection? When you are:
Sending a file to their computer you are directly connected.
AOL INSTANT MESSENGER allows a Direct Connection to the user if accepted.
ICQ when sending a file or a chat request acception allows a direct connection.
Any time you are sending a file. You are directly connected. (Assuming you know the user is not using a proxy server.)
Voice Chatting on Yahoo establishes a direct connection.
If you have none of these programs, either i suggest you get one, get a sniffer, or read this next statement.
If you have any way of sending thema link to your site that enables site traffic statistics, and you can log in, send a link to your site, then check the stats and get the IP of the last visitor. It's a simple and easy method i use. It even fool some smarter hackers, because it catches them off guard. Anyway, once you are directly
connected use either of the two methods i showed you earlier and get into DOS. Type NETSTAT -n. NETSTAT is a program that's name is short for NET STATISTICS. It will show you all computers connected to yours. (This is also helpful if you think you are being hacked by a trojan horse and is on a port that you know such as Sub Seven: 27374.) Your screen should look like this showing the connections to your computer:
------------------------------------------------------------------------------------------------
C:\WINDOWS\DESKTOP>netstat -n
Active Connections
Proto Local Address Foreign Address State
TCP 172.255.255.82:1027 205.188.68.46:13784 ESTABLISHED
TCP 172.255.255.82:1036 205.188.44.3:5190 ESTABLISHED
TCP 172.255.255.82:1621 24.131.30.75:66 CLOSE_WAIT
TCP 172.255.255.82:1413 205.188.8.7:26778 ESTABLISHED
TCP 172.255.255.82:1483 64.4.13.209:1863 ESTABLISHED
C:\WINDOWS\DESKTOP>
------------------------------------------------------------------------------------------------
The first line indicated the Protocol (language) that is being used by the two computers.
TCP (Transfer Control Protocol) is being used in this and is most widely used.
Local address shows your IP address, or the IP address of the system you on.
Foreign address shows the address of the computer connected to yours.
State tells you what kind of connection is being made ESTABLISHED - means it will stay connected to you as long as you are on the program or as long as the computer is allowing or is needing the other computers connection to it. CLOSE_WAIT means the connection closes at times and waits until it is needed or you resume connection to be made again. One that isn't on the list is TIME_WAIT which means it is timed. Most Ads that run on AOL are using TIME_WAIT states.
the way you know the person is directly connected to your computer is because of this:
------------------------------------------------------------------------------------------------
C:\WINDOWS\DESKTOP>netstat -n
Active Connections
Proto Local Address Foreign Address State
TCP 172.255.255.82:1027 205.188.68.46:13784 ESTABLISHED
TCP 172.255.255.82:1036 205.188.44.3:5190 ESTABLISHED
TCP 172.255.255.82:1621 24.131.30.75:66 CLOSE_WAIT
TCP 172.255.255.82:1413 abc-123-ppp.webnet.com ESTABLISHED
TCP 172.255.255.82:1483 64.4.13.209:1863 ESTABLISHED
C:\WINDOWS\DESKTOP>
------------------------------------------------------------------------------------------------
Notice the host name is included in the fourth line instead of the IP address on all. This is almost ALWAYS, the other computer that is connected to you. So here, now, you have the host name:
abc-123-ppp.webnet.com
If the host name is not listed and the IP is then it NO PROBLEM because either one works exactly the same. I am using abc-123-ppp.webnet.com host name as an example. Ok so now you have the IP and/or host name of the remote system you want to connect to. Time to hack!
Open up your DOS command. Open up NBTSTAT by typing NBTSTAT. Ok, there's the crap again. Well, now time to try out what you have leanred from this document by testing it on the IP and/or host name of the remote system. Here's the only thing you'll need to know.
IMPORTANT, READ NOW!!!
-a (adapter status) Lists the remote machine's name table given its name
-A (Adapter status) Lists the remote machine's name table given its IP address.
Remember this?
Time to use it.
-a will be the host name
-A will be the IP
How do i know this?
Read the Statements following the -a -A commands. It tells you there what each command takes.
So have you found which one you have to use?
GOOD!
Time to start.
Using it to your advantage
6. Type this if you have the host name only.
NBTSTAT -a (In here put in hostname without parenthesis)
Type this is you have the IP address only.
NBTSTAT -A (In here put in IP address without parenthesis)
Now, hit enter and wait. Now Either one of two things came up
1. Host not found
2. Something that looks like this:
--------------------------------------------
NetBIOS Local Name Table
Name Type Status
---------------------------------------------
GMVPS01 <00> UNIQUE Registered
WORKGROUP <00> GROUP Registered
GMVPS01 <03> UNIQUE Registered
GMVPS01 <20> UNIQUE Registered
WORKGROUP <1E> GROUP Registered
---------------------------------------------


If the computer responded "Host not found" Then either one of two things are the case:

1. You screwed up the host name.

2. The host is not hackable.

If number one is the case you're in great luck. If two, This system isn't hackable using the NBTSTAT command. So try another system.
If you got the table as above to come up, look at it carefully as i describe to you each part and its purpose.
Name - states the share name of that certain part of the computer
<00>, <03>, <20>, <1E> - Are the Hexidecimal codes giving you the services available on that share name.
Type - Is self-explanatory. It's either turned on, or activated by you, or always on.
Status - Simply states that the share name is working and is activated.
Look above and look for the following line:
GMVPS01 <20> UNIQUE Registered
See it?
GOOD! Now this is important so listen up. The Hexidecimanl code of <20> means that file sharing is enabled on the share name that is on that line with the hex number. So that means GMVPS01 has file sharing enabled. So now you want to hack this. Here's How to do it. (This is the hard part)
LMHOST File


7. There is a file in all Windows systems called LMHOST.sam. We need to simply add the IP into the LMHOST file because LMHOST basically acts as a network, automatically logging you on to it. So go to Start, Find, FIles or Folders. Type in LMHOST and hit enter. when it comes up open it using a text program such as wordpad, but make sure you do not leave the checkmark to "always open files with this extension" on that. Simply go through the LMHOST file until you see the part:
# This file is compatible with Microsoft LAN Manager 2.x TCP/IP lmhosts
# files and offers the following extensions:
#
# #PRE
# #DOM:
# #INCLUDE
# #BEGIN_ALTERNATE
# #END_ALTERNATE
# \0xnn (non-printing character support)
#
# Following any entry in the file with the characters "#PRE" will cause
# the entry to be preloaded into the name cache. By default, entries are
# not preloaded, but are parsed only after dynamic name resolution fails.
#
# Following an entry with the "#DOM:" tag will associate the
# entry with the domain specified by . This affects how the
# browser and logon services behave in TCP/IP environments. To preload
# the host name associated with #DOM entry, it is necessary to also add a
# #PRE to the line. The is always preloaded although it will not
# be shown when the name cache is viewed.
#
# Specifying "#INCLUDE " will force the RFC NetBIOS (NBT)
# software to seek the specified and parse it as if it were
# local. is generally a UNC-based name, allowing a
# centralized lmhosts file to be maintained on a server.
# It is ALWAYS necessary to provide a mapping for the IP address of the
# server prior to the #INCLUDE. This mapping must use the #PRE directive.
# In addtion the share "public" in the example below must be in the
# LanManServer list of "NullSessionShares" in order for client machines to
# be able to read the lmhosts file successfully. This key is under
# \machine\system\currentcontrolset\services\lanmans erver\parameters\nullsessionshares
# in the registry. Simply add "public" to the list found there.
#
# The #BEGIN_ and #END_ALTERNATE keywords allow multiple #INCLUDE
# statements to be grouped together. Any single successful include
# will cause the group to succeed.
#
# Finally, non-printing characters can be embedded in mappings by
# first surrounding the NetBIOS name in quotations, then using the
# \0xnn notation to specify a hex value for a non-printing character.
Read this over and over until you understand the way you want your connection to be set. Here's an example of how to add an IP the way I would do it:
 #PRE #DOM:255.102.255.102 #INCLUDE

Pre will preload the connection as soon as you log on to the net. DOM is the domain or IP address of the host you are connecting to. INCLUDE will automaticall set you to that file path. In this case as soon as I log on to the net I will get access to 255.102.255.102 on the C:/ drive. The only problem with this is that by doin the NETSTAT command while you are connected, and get the IP of your machine. That's why it only works on simple PC machines. Because people in these days are computer illiterate and have no idea of what these commands can do. They have no idea what NETSTAT is, so you can use that to your advantage. Most PC systems are kind of hard to hack using this method now because they are more secure and can tell when another system is trying to gain access. Also, besure that you (somehow) know whether they are running a firewall or not because it will block the connection to their computer. Most home systems aren't running a firewall, and to make it better, they don't know how operate the firewall, therefore, leaving the hole in the system. To help you out some, it would be a great idea to pick up on some programming languages to show you how the computer reads information and learn some things on TCP/IP (Transfer Control Protocol/Internet Protocol) If you want to find out whether they are running a firewall, simply hop on a Proxy and do a port scan on their IP. You will notice if they are running a firewall because most ports are closed. Either way, you still have a better chance of hacking a home system than hacking Microsoft.
Gaining Access

8. Once you have added this to you LMHOST file. You are basically done. All you need to do is go to:
Start
Find
Computer
Once you get there you simply type the IP address or the host name of the system. When it comes up, simply double click it, and boom! There's a GUI for you so you don't have to use DOS anymore. You can use DOS to do it, but it's more simple and fun this way, so that's the only way i put it. When you open the system you can edit, delete, rename, do anything to any file you wish. I would also delete the command file in C:/ because they may use it if they think someone is in their computer. Or simply delete the shortcut to it. Then here's when the programming comes in handy. Instead of using the NBTSTAT method all the time, you can then program you own trojan on your OWN port number and upload it to the system. Then you will have easier access and you will also have a better GUI, with more features. DO NOT allow more than one connection to the system unless they are on a faster connection. If you are downloading something from their computer and they don't know it and their connection is being slow, they may check their NETSTAT to see what is connected, which will show your IP and make them suspicious. Thats it. All there is to it. Now go out and scan a network or something and find a computer with port 21 or something open.
Read more ...

Saturday, 20 October 2012

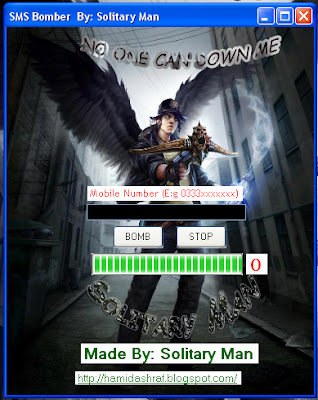
Sms Bomber Free Download by Solitary Man


Sms Bomber Free Download by Solitary Man


Download :
Solitary Man Sms Bomber

Read more ...

Monday, 15 October 2012

Earn Money by Surfing Anything [ Jointopline ]

Hello
 Guys,
Now I Am Going To Tell You One Amazing Program. You Can Earn More Money Threw Just Surfing A Web NOT THEIR WEBSITES.
Cool????
Ammm Threw Jointopline We Can Earn Money  In Different Ways:-


1)Surfing Web. 
2)They Have Also Referral Program. We Can Earn Money Threw Referral Program.

"TopLine is a Los Angeles startup founded in November 2011. We believe that traditional online advertising models can be improved. We believe that users should be rewarded for the ads they see while surfing the web. We're doing our best to partner with ad networks and make magical things happen."

This Is Payment Proof :-
Click Here To Join Topline.
Read more ...

Sunday, 23 September 2012

Send Free SMS To Earn Money by ULTOO


Ultoo.com came with an very extraordinary concept for the online money making lovers. They just created a platform through which you will be rewarded for sending free sms to any mobile phone number in all over India. It is an totally Indian concept and free to join. There is not any kind of cost will be charged from the users to join this website. According to the latest news released by Ultoo.Com, total number of users on the website have crosses 1 million.
The features of the websites are really attractive which is the reason behind the high progress of Ultoo SMS website. The main service which Ultoo provides to its user is free text sms service to any number of India. It consumes the sms expenses of your prepaid mobile phone.
But besides it you can do also earn for sending free sms to your friends. For sending one sms you will get Rs. 0.2 /- in your account. It seems like the 2 paise is very low. But I personally send hundreds of sms daily by using other free SMS service website. I was happy with that but if I am get 2 paisa for sending each SMS and send 100 sms daily. It means I have earned Rs. 5 /- for a day. Hypothetically, I earned Rs. 150 /- after a month. It means its not a bad deal. If I get this amount as a mobile recharge after a month.

You can also earn for referring other friends too for this website. If I am referring a friend then myUltoo.com account wallet will get credited with Rs. 1/- @ of each referral. As my social friends are in thousands and if only 100 of them have joined this program for the sake of income generation for free recharging their mobile phone then I will get Rs. 100 /- for it which is not at all bad for me.
The amount which you have earned through Ultoo can be redeemed through the mode of mobile recharge only. You can easily recharge your mobile phone with the amount earned with. I have also recharged my mobile phone which forced me to add a line about his program “100% working.” As many people like me have faced so many concepts like this but they found it totally fake or fraud kind of money generation programs. But personally I can assure you that Ultoo.com is totally a genuine website concept.

clickhere>>>JOIN ULTOO<<<clickhere


Read more ...

Saturday, 1 September 2012

Enable Task Manager disabled by Administrator or Virus in Windows


Windows Task Manager is used to view details about processes running on your computer. Since it can be used to terminate programs that are misbehaving or are viruses disguised in the form of harmless programs, most spyware and viruses disable it to prevent themselves from being closed through it. Some administrators also disable Task Manager to prevent users from closing important security programs like antiviruses and anti-malwares.

In such situations, running the Task Manager will give the "Task Manager has been disabled by Administrator" error. However, there are some techniques you can use to re-enable task manager and close those harmful programs manually. This article contains few such simple techniques you can use to regain access to Task Managing privileges.


Create a Registry(.reg) file for enabling Task Manager

If you are unfamiliar with manually editing the Registry, you can create a Registry file which will automatically modify the Registry Key to re-enable Task Managing. To create one such file:-
Open Notepad or any other text editor.
Copy the code given below and paste it as it is in it.


Windows Registry Editor Version 5.00 [HKEY_CURRENT_USER\Software\Microsoft\Windows\ CurrentVersion\Policies\System] “DisableTaskMgr”  =dword:00000000

Save the file as Enable Task Manager.reg or *.reg.

Open the file by double clicking on it.

Registry Editor will ask you for confirmation. In the confirmation Window, click Yes.
Task Manager would immediately be accessible. If it is not, restart your computer.

Read more ...
Related Posts Plugin for WordPress, Blogger...